06.29
This was a one night project; to build the ultimate high-powered air-assisted marshmallow shooter (well, or just a better one than the regular blow-gun style guns found everywhere). The shooter had to be used the next day in a shoot-out, so only one evening could be dedicated to design and fabrication. To keep things simple, I wanted to restrict the parts to standard PVC fittings available at Home Depot (with the one exception of the inner barrel, as you’ll see below). I also wanted to avoid any adhesives, glue, fasteners or taping in the construction. This was to save time and to make it easy to take the shooter apart for cleaning. Basically, it should be easy to put together and take apart.
Rewind two days…
For my daughter’s birthday, we set up a station where all the kids could build their own marshmallow shooters out of 0.5″ PVC pipe and fittings. This was a big hit at his year’s Maker Faire, and she wanted to do the same thing at her party. A quick trip to Home Depot, 80′ of PVC pipe, bags of connectors, and an hour with the miter saw, and we had all the parts for 30 shooters (oh, plus 5 rolls of patterned Duck Tape to decorate them).
It was a big hit, they worked well and the kids loved them, spending the afternoon shooting each other with mini marshmallows (that, or stuffing the marshmallows in their mouths as fast as they could before their parents found out). Either way, everyone left happy.
A few days later, I was to test my best design for a shooter against that of one of the party’s guests (who had a pretty good traditional shooter). Since the rules were, build the best shooter you could, I quickly decided to give myself a little “edge”, and build an air-powered shooter. But I also wanted to fix one glaring problem with the traditional PVC marshmallow shooters.
What’s the problem?
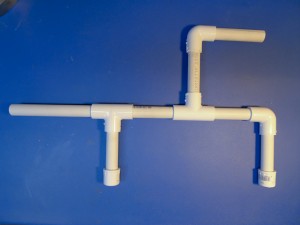
Here’s the design for a typical 0.5″ PVC marshmallow shooter found around the internet.
It’s made from 0.5″ Schedule 40 PVC pipe. 1×6″ pipe, 6×4″ sections, two T connectors, two elbows and two end caps. Put them together, and you have a marshmallow gun. It works well, but not fantastic.
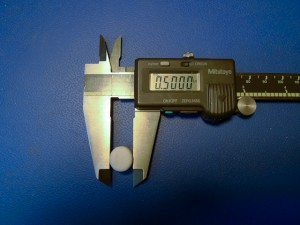
Here’s the problem. The average size of a typical marshmallow is about 0.5″
(take this measurement with a grain of salt… this one just happened to be 0.5000″ on one side, some are larger, some are smaller, and they are very soft and compressible).
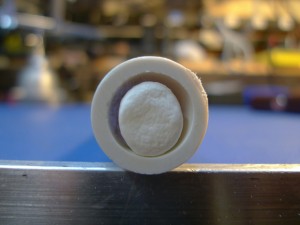
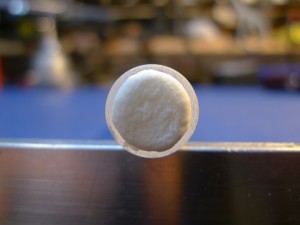
When you insert a marshmallow into the barrel of a 0.5″ PVC pipe, there is a pretty big gap between the marshmallow and the inside of the tube.
A portion of the air that is used to propel the marshmallow will escape around the projectile.
A barrel with a slightly smaller diameter would be ideal, and it turns out that one exists.
0.5″ PVC has an internal diameter of 0.617″. Tap Plastics sells an Acrylic tube with an internal diameter of 0.488″, slightly smaller than an average marshmallow, but pretty close.
(also note, marshmallow diameter changes depending on freshness and duration of air exposure. The longer they sit out in the open, the smaller than diameter gets, they also tend to decrease in diameter after firing).
This tube looked perfect, but it’s just an acrylic tube, you still have to build an impressive shooter around it.
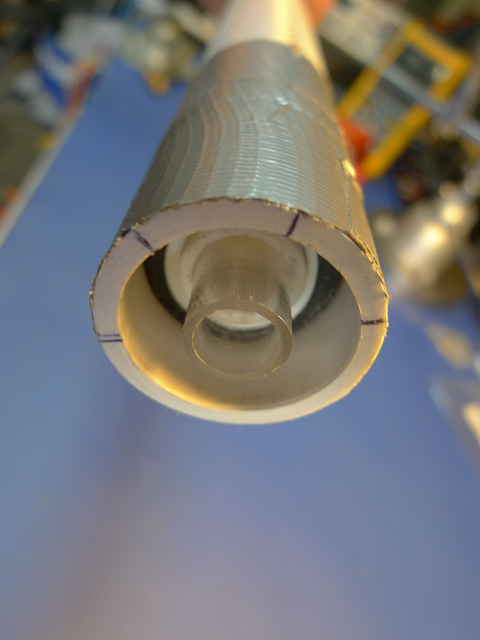
Fortunately, this tube fits (tightly) inside a 0.5″ PVC tube, allowing you to create a second, internal barrel.
The Prototype
Since the shooter will be air powered, it will get it’s air supply from a portable air tank. To test the new tube, we had to pick a nozzle for the air canister that we would use.
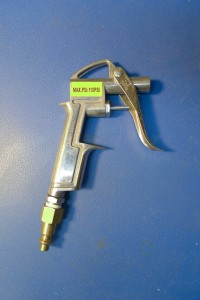
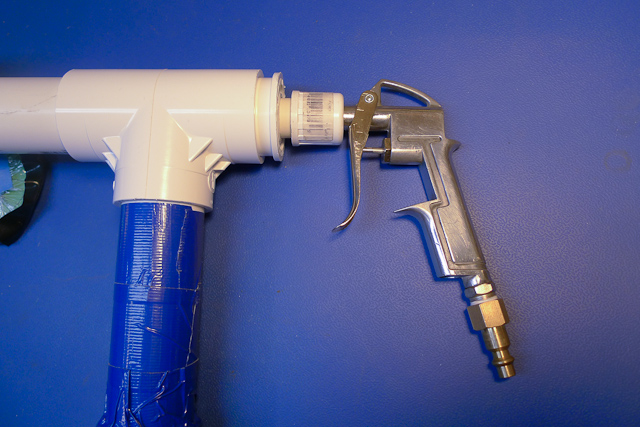
Harbor Freight sells a prefect air gun kit which supplied us with the trigger for the shooter for $3.99.
I tested various nozzles in the air gun, but the tiny orifices really resisted the volume of air that that was available. In the end, the best results were obtained from the largest opening, or no nozzle at all.
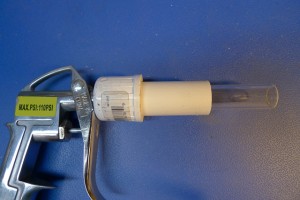
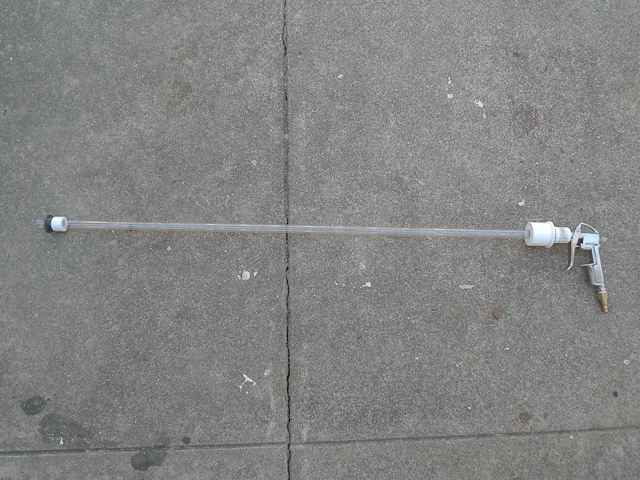
A few pieces of cut pipe, and we had ourselves a prototype:
This worked great, the marshmallow flew out of the barrel at high speed.
The Marshmallow Cannon
I figured the final design had to be be big and impressive looking, 1.25″ PVC was selected for the outer barrel. It allowed us to easily mount the new Acrylic Barrel inside and provided a substantial looking shooter.
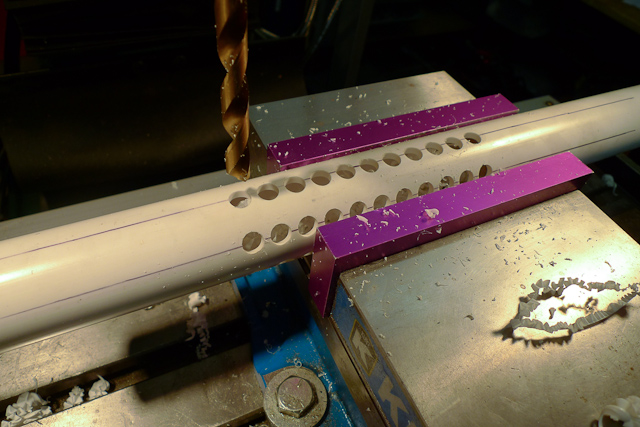
For effect, I drilled out a series of “vent” holes in the barrel. Why? Well, every big cannon looking gun in the movies has them, so our shooter should as well.
Fortunately, the DRO on the milling machine made this a very quick operation. Eleven holes were drilled in three rows with a 1/4″ bit around the outer barrel.
The next thing we needed was a sight, and the ultimate in marshmallow sights has to be a red laser sight.
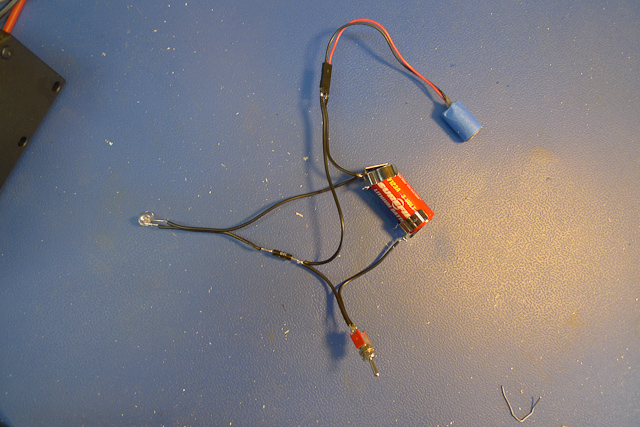
Fortunately, I just received a great little 4mw red laser module from All Electronics. It had a current limiting PCB attached, so you just powered it with 3V and it was good to go. For the power source, a 3V Litium CR123 battery was used. That should allow this to last for some time. I had a set of spring loaded CR123 battery terminals, and this allowed for the battery connections. For effect, a high-powered red LED was added to show that the laser was engaged.
The circuit is straight forward enough, 3V to the laser diode and the LED in parallel with a 30 ohm limiting resister.
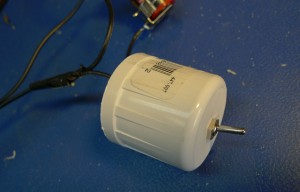
All of this was packaged inside a section of 1″ PVC pipe. The switch was mounted into a 1″ PVC end cap.
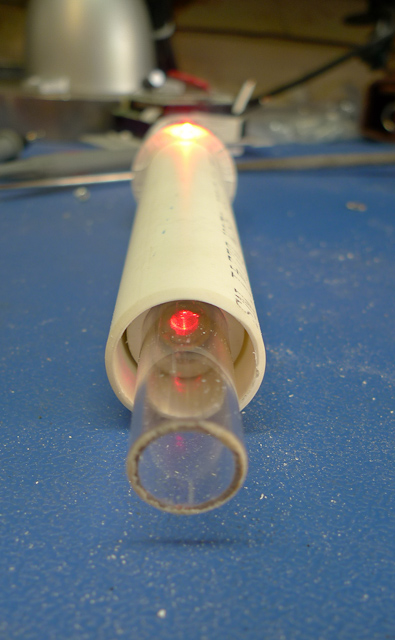
A few inches of blue tape around the laser module made for a snug fit inside a small section of the same acrylic tubing that we were using for the main barrel.
The finished laser sight, with LED mounted at the top. Note, a #10 drill bit is the perfect diameter for a 5mm LED, and provides a very snug fit with no need for an LED holder or any glue to secure it.
The laser is mounted inside a short section of the same 5/8″ acrylic tube used for the inner barrel. It turns out it’s almost the same diameter as the laser module. A PVC reducer is used to mount that acrylic tube into the 1″ PVC tube that houses the laser assembly.
It works!
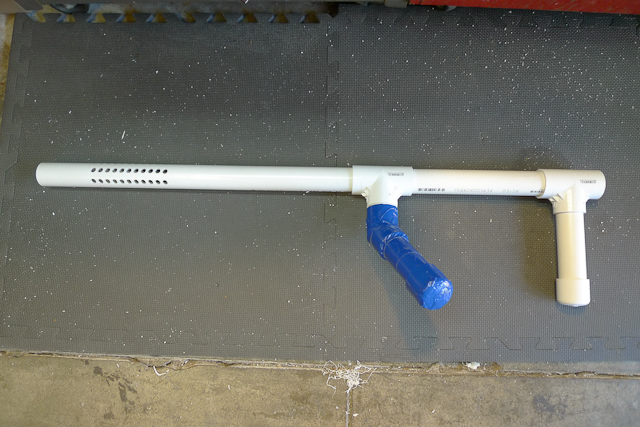
Now, on the main design. For a shooter of this size, we figured that two handles were appropriate to wield such a weapon.
The overall length of each section doesn’t really matter, you can make it any length, the key will be to in cutting the inner acrylic tube to fit inside your outer barrel.
The real challenge was in figuring out how to mount the acrylic tube inside the 1.25″ PVC tube. I thought of making some custom mounts on the laser cutter, but that would have extended the build time, plus, I liked the idea of being able to build this out of standard PVC fittings available at Home Depot. Turns out there was a solution with a creative use of fittings.
As I found out from the previous shooter, the barrel has to be easily accessible for cleaning. One wet marshmallow and you suddenly have sticky goo all over the inside of your barrel. Your shooter won’t fire again until you clean it out and fully dry the barrel. The barrel had to be easily removable but still secure and solid in the gun and quick to replace in the outer barrel.
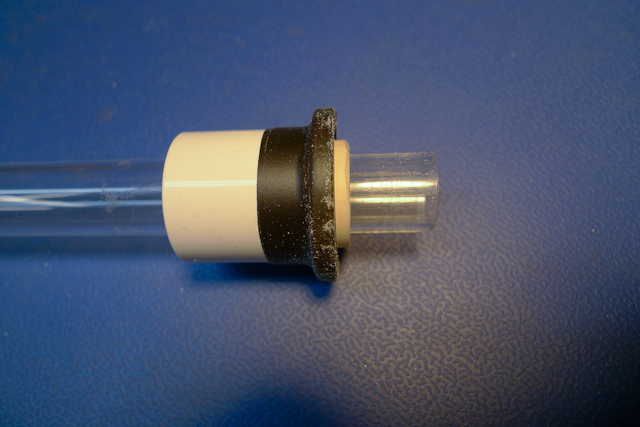
I concluded that the acrylic tube should have two mounts, one at the front and one at the back. The front mount was use a 0.75″ to 0.5″ PVC reducer. It turns out that the external diameter of a 0.75″ PVC reducer is almost exactly the internal diameter of a 1.25″ PVC pipe. A few wraps of vinyl tape to increase the diameter, and we had a snug fit. The front mount shouldn’t be too tight, the inner barrel will be secured at the back, you want it tight enough so that it won’t move around much, but it should slide freely.
Here is the front mount:
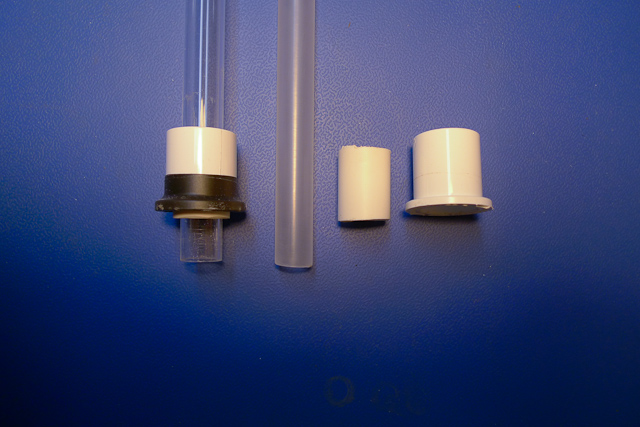
A breakdown of what this is:
Assembled section on the left, and the parts, in approximate location, on the right. The acrylic tube fits snugly inside a short section of 0.5″ PVC, which then fits into the end of the 0.5″ to 0.5″ PVC reducer. All this center’s the acrylic pipe in the reducer, which then fits into the 1.25″ PVC outer barrel.
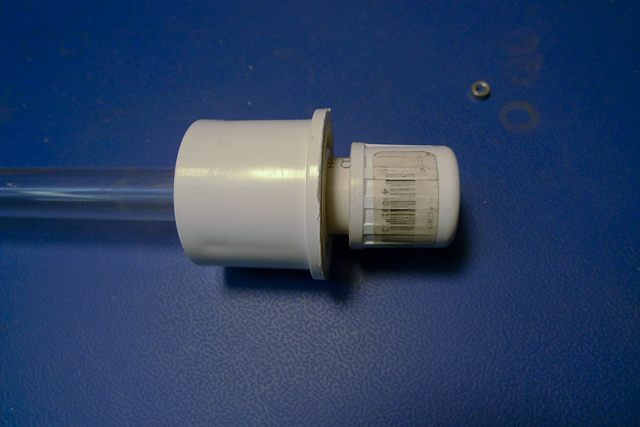
The back end was a little more complicated.
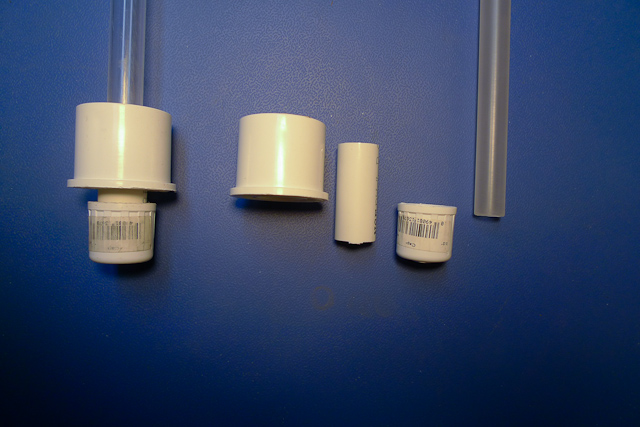
For this, we used a 1.25″ to 0.5″ reducer. The end cap had a hole that would allow the end of the air gun to fit securing to the opening.
Again, assembled part on the left, components on the right. From right to left, the acrylic tube fits inside a 2″ section of 0.5″ PVC, which then fit’s into the 1.25″ to 0.5″ PVC reducer, and finally a 0.5″ PVC end cap. The PVC end cap has a hole cut in it which allows our air gun to fit snugly into end cap.
Note, inserting the acrylic tube into the PVC fitting is a real paint, the acrylic is about 0.005″ too thick, which makes it difficult to insert. I tried sanding the ends down, which helped, but in the end I made them all fit together with the help of a very large rubber hammer. Try not to pound too hard as the acrylic can crack and shatter, unlike the PVC.
You want the tube length to be such that the back mount is secured into the outer barrel but it ends around the front of the barrel. Here is the tube mounted in the back:
The front:
The marshmallow is loaded from the end of the shooter, so the tube has to be about the same length as the overall shooter. It can’t be recessed too much into the outer barrel.
The entire tube with mounts:
Lastly, mounting the laser module. I used the quick and dirty solution of using two plastic cable ties to secure it. This has the added benefit of allowing you to adjust the aim of the laser sight by just nudging it.
The Completed Cannon
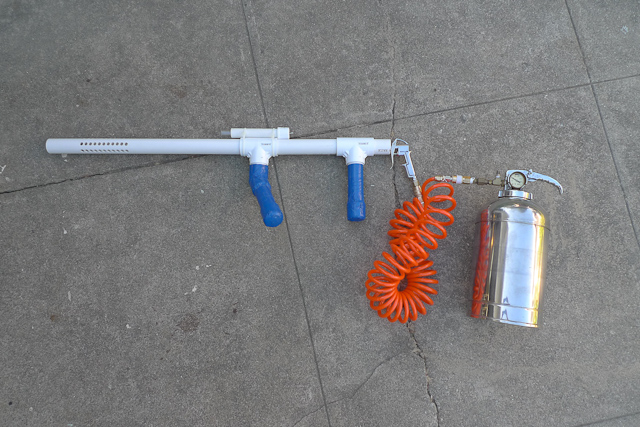
The air gun nozzle is attached to the air tank with some coiled hose, also purchased from Harbor Freight, but Home Depot sells this. I can’t recall where I got this particular air tank from, but you can use any, Home Depot, Harbor Freight and many stores sell a variety of tanks. Some quick connect fittings were used to tie the air hose into the tank and nozzle.
Testing the Cannon
So… does it work? Yeah, I’d say it does! Just follow the little red laser dot to see where it will hit.
Conclusion:
This design worked pretty well. Don’t expect a huge amount of accuracy from marshmallows, they tend to leave the barrel and arc widely to the left or right. I wore the air tank in a back-pack, and the entire rig had a “Ghost busters” sort of feel to it. The Laser site rocks. I’ve seen a design to build a enclosed air tank from large diameter PVC, if I were to make a V2, I would consider this option.
- Marshmallow size varies dramatically. The best shots are from marshmallows that are exactly the same diameter as the inner barrel, and when inserted into the barrel, tend to slowly fall down the barrel.
- You can use a wooden dowel to gentle push down larger marshmallows to the bottom of the tube.
- The further you can push the marshmallow into the lower part of the barrel, the better it will fly. The worst shots were with marshmallows loaded into just the front of the barrel.
- Tight fitting marshmallows tended to lose some diameter after being fired, which would them ideal for reuse.
- After I built this, I found this very cool website that sells plans to build other marshmallow shooters, also out of PVC: http://www.myaircannons.com
Breakdown
| Build Time | ~ 3 hours |
| Total Time | 1 day |
| Cost | ~ $25 (not including the tank) |
| Difficulty (1 to 10) | 2 (all you need is a saw, a drill and a bag of marshmallows) |


Thank you!!! I was at a parade the other day with my family, including my twin (fraternal) sister, when I saw a booth that sold marshmallow guns- fun for kids and drunk’s of all ages…
Long story short, I am now in a competition for build a better marshmallow gun than my sister…. This will definitely help, as I never thought of inner barrels!!!
Thanks for the great tutorial! I just can’t find the acrylic tube name on Tap Plastics. Could you possibly supply me with the name for the .488″ ID tube?
Hmmm, Looking at the Tap website, I see your point, nothing is labeled to indicate which one it was. I think it was the Acrylic tube with an OD 5/8 and ID 0.5. Will measure it the next time I’m in Tap.
When i click on the air tank link, it says 404. Can you link me to a portable air tank please?
And also a regulator so i can limit the fps?
Yes, that’s a good idea, although I’ve found that max pressure from my tank works best. I can only store ~ 70psi. I know that Harbor Fright makes a small dial regulator, I use it on the air gun that’s next to the milling machine when I want to “gently” blow away dust and debris. HB Air Regulator